Install AccessIQ and run your first scan
Install the free plugin, follow the three-step setup and scan your first page for WCAG problems.
On this page
AccessIQ checks your WordPress pages against WCAG 2.1 and 2.2, fixes a few common problems automatically and gives your visitors an accessibility toolbar. The free plugin needs no outside service. This page takes you from install to your first report.
Install
- In WordPress, open Plugins → Add New and search for AccessIQ. Or upload the
accessiqfolder to/wp-content/plugins/. - Click Install, then Activate. The AccessIQ menu appears in the admin sidebar.
The setup guide
After activation a short setup guide opens. It has three steps, each optional, and you can change everything later or press Skip setup:
- Scan a page. Enter a page URL on your site, pick the WCAG version and level, and run the scan.
- Accessibility toolbar for visitors. Turn the visitor toolbar on or off.
- Accessibility statement. Generate and publish a statement page.
The free scanner checks pages on your own site only.
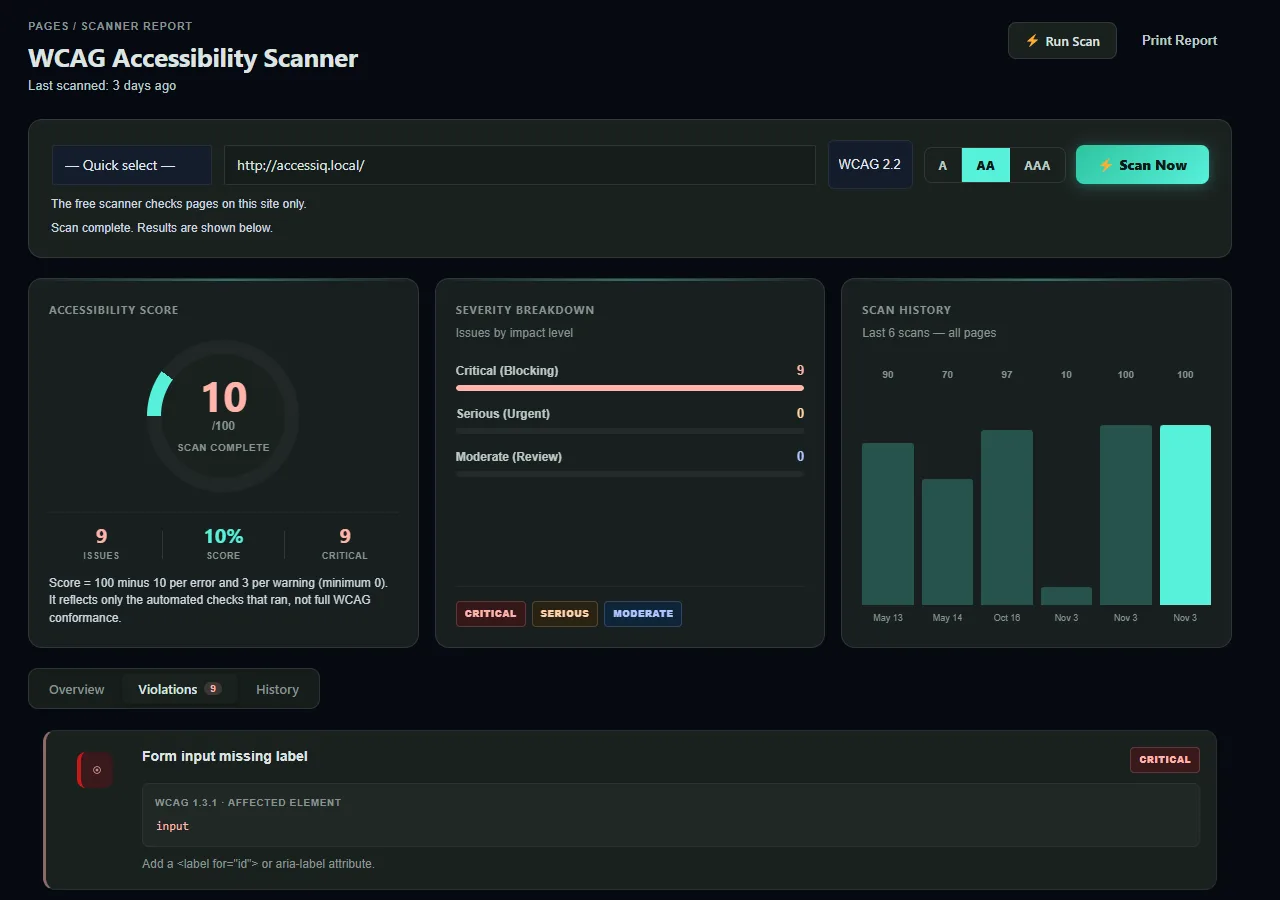
Read the report
When the scan ends you get a score, a severity breakdown (Critical, Serious and Moderate), a score history and the list of violations. Open any issue for a plain explanation of how to fix it. See The WCAG scanner.